Things You Will Need:
-Empty picture frame
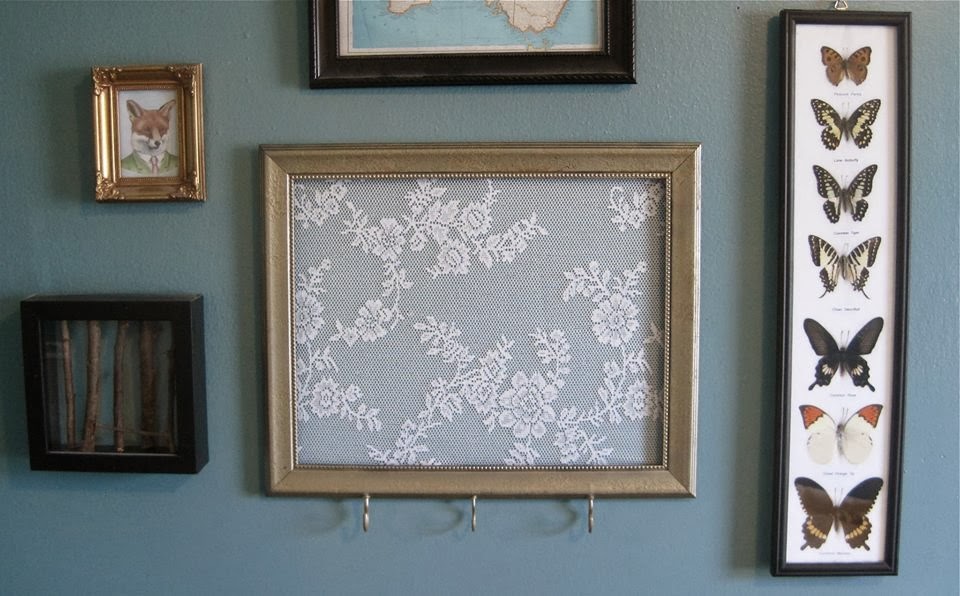
-Vintage lace curtain or purchased lace material
-Spray Paint (I chose "Gold Rush" from Rustoleum's "Hammered Finish" line.)
-Glue gun or craft glue
-Screw-in hooks
1.)Remove any glass and backing from your picture frame. Take as many screw-in hooks as you need and screw them into the bottom part of the picture frame so they are all facing forward.
In a well-ventilated area or outside, spraypaint your picture frame and hooks to the desired color (the "Hammered Metal" line of Rustoleum paint is pretty cool because it gives a weathered patina finish) Allow to dry.
2.) Take picture frame and lay on top of lace curtain/fabric to use as a cutting guide. Cut lace to appropriate size.
3.) Grab your pre-heated glue gun and run a bead of glue along the perimeter of the picture frame back (you can use craft glue, but I like a glue-gun because it dries very quickly and requires less time holding fabric). Add lace and pull taught. Let dry.
4.) Hang on wall. Add jewelry. Stand back to admire the fact that you have a badass organizer that didn't cost $40 at Urban Outfitters.

No comments:
Post a Comment